Showing posts with label mini-books. Show all posts

Monday, August 18, 2014

Mon Ami Gabby + Kiwi Lane

I have a Design Team post over at Kiwi Lane today!!!

Go HERE to see my big giant face.

This month I received a big pile of pretties from Mon Ami Gabby! Seriously beautiful stuff! Everything was very dimensional and maybe not acid free... MINI ALBUM!!!

Here is what I made:


The photos going in here are not printed yet... but they match perfectly :)

If you want to see how to make this scallop:


using the balloon shape from the Celebrate set or see how to gather burlap ribbon like this:


with no tools at all then you need to go to Kiwi Lane's blog HERE!

If you just want a BUNCH of photos, you've come to the right place!

Pages 1 and 2:


Pages 3 and 4:


Pages 5 and 6:


Pages 7 and 8:


Pages 9 and 10:


And the back cover:


I had WAY too much fun with the Mon Ami Gabby ribbon and twine!

The front is still my favorite:


I made the flower by just hand stitching along one side of the ribbon and gathering it into a rossette:


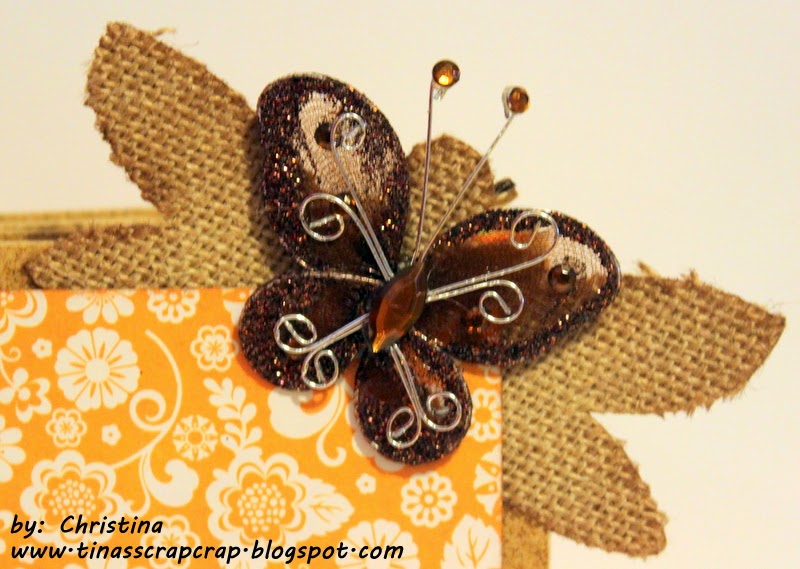
Ok! One last picture because I love this butterfly:

Whew!

Picture overload!

See you soon!

Monday, June 10, 2013

For Squishy-Wishy

Ok, his name is not REALLY "Squishy-Wishy"... but it's an awfully cute nick-name for an awfully cute baby!

Here is what I made him (or his mom, I guess):


It's a baby-boy mini-book! There are tons of little pull-out tabs, lift up tabs, and pocket tabs all over! Here are all the pages:


Fun, huh?! 

I used pretty much all retired Close To My Heart stuff: the album, the paper, the felt... but at least the chipboard stars, ribbon, and buttons are all current!

Welcome baby Wish!


Wednesday, September 12, 2012

How To Fix Your My Creations Bookmark Album

Close To My Heart has a really cute mixed-page mini-album called the My Creations Bookmark Album. I LOVED the magnetic flip-over clasp; but the whole thing was so skinny! I doubted if I could even layer a photo and patterned paper on each page and still close the book (you can, but barely). 

So I fixed it.

Step one: 
Remove the flimsy tiny jump rings that it comes with. Usually I have no complaints about a Close To My Heart product, but these are really bad quality! Go buy some sturdy ones from an office store as large as you like to fit your book. 

Step two:
Lay out just the last page with the magnetic flap. Chop out the little rectangle between the creases where the flap closes, like this:


Step three: 
Cut yourself a wider one! Mine is cut from 2 pieces glued together of that thin chipboard that comes with a pad of paper. You could use normal chipboard, cardboard, even a few cereal box pieces would be great. Cut your new piece as tall as the old one and as wide as you need for your book to be thicker. Mine is only about 1/4 an inch wider, but it made a world of difference!


Step four: 
Get your Duck Tape. Yes, we are being manly and fixing our girly scrapbook album with Duck Tape. It is ok to borrow your husbands if you do not currently own your own roll :) I used silver, because that's what we had and I am impatient. White would probably have blended in better in this case... Measure and cut 2 pieces the same length as your book (it's about 4 inches). 

Step five:
Line up your album back, your new rectangle, and the magnetic flap onto one of the Duct Tape strips. MAKE SURE YOUR MAGNETIC FLAP IS CLOSING THE RIGHT WAY!!! We don't want to go to all this work and have the flap not connect! Leave a little bit of room between all the pieces so they are still flexible. Once lined up straight, press down hard! (Obviously try to line up really good before the pressing... or your chipboard will look like mine when you rip it off for a second try...)


Step six:
Flip your book over. Line up the other Duct Tape strip and press onto this side. Really press hard and seal the tape together in the creases.  Both sides should now have a lovely strip of duct tape connecting your new rectangle to your mini-book. 


Step seven:
For the love of all things holy, DECORATE THE DUCT TAPE! Unless, of course, this is an album for a teenage boy or something... that would look awesome! And the silver really isn't bad. You hardly see it, see? 


Ta-da! Finished album! Only now it is thick enough to not only hold paper AND photos, but embellishments as well! And it still closes magnetically!


Wow, that was quite the post! Let me know if you have questions!


Sunday, April 1, 2012

Expo Recap- part 3

This is an official record: 3 posts in 3 days! This will never happen again...

Here is my third and last mini-book from the Scrapbook Expo:


My photograph really doesn't do this book justice! The front is stamped acrylic and the inside is canvas-covered chipboard. This book is by incredible Jamie Dougherty from Prima. (check out their new ustream class channel HERE) She is a really good teacher!

If you are like me, you open a pack of Prima flowers and think the packaging is almost as pretty as the product! So we used it:


The photo mat is the backing from the burlap strips! So creative.

The buckle is my FAVORITE part of this album, but it was supposed to be yellow. I liked the pink side better...


 So I just reversed mine and covered the ugliness with sparkles! I love it!


As a last expo-parting moment I would like to share the only supply I needed to adhere EVERYTHING on each of my 3 mini-books:


Best. Glue. Ever. 

You know it's good when it's flammable!

Saturday, March 31, 2012

Expo Recap- part 2

Holy cow! Two posts in a row!

From the second class that I took at the Scrapbook Expo, here is mini-book number 2:


The entire album is canvas! How fun is that?! Canvas Corp and Tattered Angels teamed up to teach this class. We used tons of spray mist; which I learned washes out of clothing ;)


This gold trim and flower get their sparkle from this stuff:


Glimmer Glam! We painted it on canvas, trim, doilies, and flowers and it worked great. Dig deep with your paintbrush to get the most glitter!


The turquoise color around the butterfly is:


Glimmer Glaze! This has less glitter than the Glimmer Glam, but has a neat little nail-polish-like brush built in. The best thing about this stuff is that you can color clear sparkles with it!

Ok, no, the best thing is that I got these for $1 a bottle!

Gotta love the last hour of the expo!

Friday, March 30, 2012

Expo Recap- part 1

It's only been one week since the Scrapbook Expo and I am already missing it! I figure posting about all the fun I had might help me relive it a bit :)

I was able to take 3 classes this year!!! All mini-books, my favorite! Here is mini-book number one:


This is a beautiful 8x8 acrylic and chipboard album by the creative people at Clear Scraps. (visit their site HERE) The owners of this company are a husband and wife team. She is the artistic genius and he hand-cuts the acrylic!


I went a little overboard with the "pearls" on my album... because I LOVE them! They are pearls in a bottle! So economical and easy to use, I bought a few:


Obviously a fan! 


I also loved the gold around the edges of everything! That comes from these leafing pens:


It glides on really smooth and looks amazing on acrylic!

I learned one AMAZING thing from this class that totally cured all my fears of working with acrylic: 


With non-acetone nail polish remover, you can remove ANY (yes, even Staz-on) messed up stamping or stray adhesive FOR UP TO A YEAR!!! I know this works because I hit a bump in the table with my stamp and had the embarrassing opportunity to try it out in class. Wipes right off!

Stay tuned, more expo fun to come!

Thursday, December 8, 2011

Christmas box

I have mentioned before what creative people I get to hang out with being a Close To My Heart consultant; so I was TERRIFIED that I had to make a "Christmas something" for a swap with all those creative people! The only rule was to stay under $10 and use all CTMH products. This is what I came up with:


From the outside it just looks like a present, but open it up and...


It's an exploding box! I love making these for Christmas! Someday I will post pictures of my other ones with different themes. I left this one pretty generic so whoever ended up with it could personalize it themselves. 


There are 8 little pockets with journaling tags inside and room for at least 9-21 photos! 


I am happy to report that the woman who ended up with my exploding Christmas box was happy, and the rest of the group was so impressed that I am teaching them all how to make it in January!!! Talk about an honor!

Just goes to show that maybe we shouldn't be so hard on ourselves all the time!